



Eastman Kodak No.1A Pocket Junior Model B Film Test - Shooting 116 Film in a 100 Year Old Camera
This Kodak No.1A Pocket Junior Model B in stunning green is no longer just a display piece - these century-old cameras make great images, even with the limitations of the Kodak Anastigmat f7.7 lens.
Reminder: you can buy fresh 116 film at Blue Moon Camera. We carry Ilford HP5 spooled by Film For Classics on metal spools -- shoot with your vintage Kodak! 116 is a formerly extinct film format that measures a bit larger than modern 120 film. And we carry 616 film as well!
Check out more videos like this on our YouTube channel: https://www.youtube.com/@BlueMoonCamera.

The Italian-Made Silvestri SLV Medium Format Camera Up Close
Today we’re shooting with the original Silvestri SLV, a medium format technical camera built in Italy in the 1980s.
Designed by Vincenzo Silvestri around the famous Schneider 47mm f5.6 Super-Angulon lens, the SLV is CNC-machined out of solid aluminum blocks, yielding Linhof-like build quality and a very refined feel in hand.
The Super-Angulon lens is fixed in this early model and is set in a Copal-Press shutter. Unlike most shutters, it is self-cocking, but does max out at a top speed of just 1/125th.
The key functionality of the Silvestri SLV is the shift mechanism, which is very finely geared and provides 25 degrees of lateral shift or vertical rise and fall, depending on the orientation of the camera.
Loosening this lock allows us to rotate the ground glass assembly, which has detents every 90 degrees and can be fixed in any orientation.
With it locked back in place, let’s take a look at the unusual bellows viewfinder attachment, which seems a little silly but does aid in fine-tuning focus on the ground glass and removes the need for an external loupe.
The Silvestri SLV accepts all standard Graflok-type film backs and ground glass accessories — today we’re going to use a Horseman 6x9 film back that comes included with this kit.
With the back set in place, tightening these two red tabs on either side locks it. Even with the film back attached, the SLV is remarkably compact for a camera of this specification.
To load the back, we slide the release button up to open it, and remove the film insert.
The box for this early SLV is marked “6x7,” but it works great with the 6x9 format as well and can even handle 6x12 film backs.
Today we’re loading with Kodak Gold, our trusty testing film.
Like most medium format backs, film is wound back around the pressure plate. Insert the tip of the leader into the empty take-up spool, and then wind the advance lever until the stark mark shows in this circular cutout.
Then, set in the insert back into the film back, close the film door and lock it, and then wind until the advance automatically locks at “1” — we’re now ready to shoot, after removing the dark slide of course.
One interesting thing about this camera in particular is that the 47mm Super Angulon is fixed focus, with no helical for focus adjustment as is commonly seen on the SLV.
This lens has so much depth of field that this isn’t a problem in practice, with pretty much everything from 3ft to infinity in focus by f11.
We used a tripod for these indoor shots due to the small aperture and slow shutter speed, and then dialed in some rise to show more of the ceiling without tilting the camera, which would create perspective distortion.
Here’s another example of how we can utilize the shift mechanism on the Silvestri SLV:
First, I took a picture with no shift — yes, it can also be described as rise in this orientation — and then took another with the full 25 degrees of shift dialed in.
There is some vignetting as we hit the edge of the image circle, but when we stitch the image, we get this fun extra-tall frame.
Like most technical cameras, the SLV is primarily intended for use on a tripod, but it’s so compact that we had to try shooting with it hand-held.
For this, I installed a Leica 21mm viewfinder that roughly approximates the angle of view of the 47mm Super Angulon on 6x9.
Surprisingly, the Silvestri SLV was really fun to use handheld. What do you think of this rare Italian machine?
Check out more videos like this on our YouTube channel: https://www.youtube.com/@BlueMoonCamera.

Unboxing the Yashica T4 Super
Hey folks, today we’re unboxing and shooting a roll with my favorite compact camera — the Yashica T4 Super, also sold as the T5.
Built by Kyocera in the early 1990s, the T5 has earned cult classic status in the decades since with its excellent Zeiss lens and notable use by famous photographers and celebrities.
Prices skyrocketed for this once-affordable camera, raising the question — does the Yashica T5 still represent a good value in 2025?
We’ll shoot and share a whole roll of samples to find out, let's get started.
The T5 has a smooth, uncluttered design, which has every feature you need for point-and-shoot photography, and the addition of a fun “super scope” waist level finder.
Critically, the T5 is unburdened with extra features and modes, its external simplicity mirrored in its easy operation.
Build quality is solid but lacks the luxurious hand feel of the Contax compacts also made by Kyocera, but what the T5 lacks in luxury it makes up for in plucky reliability.
Seriously: I have dropped, accidentally stepped on, and otherwise roughed up my personal T4 Super for the better part of a decade, and it still fires ready for action at a moment’s notice.
Autofocus is quick and shutter lag is minimal, and the image quality of the Zeiss 35mm f3.5 Tessar is truly excellent, with great contrast, color, and detail reproduction.
Whether you’re photographing once-in-a-lifetime vistas or a walk around the neighborhood, the T5 simply delivers every time, and slides much more comfortably into a pocket than something like a Contax T2.
And while the T5 commands strong prices for a plastic camera — hovering around $500 in 2025 — it’s much more affordable than a T2, TC-1, or 35Ti, and just as capable.
For me and many others, the Yashica T5 is the definitive 35mm compact camera. If you’ve got one of these and some decent film, there’s no excuse not to create your magnum opus, or at least a fun project.
Thank’s for watching y’all.
Check out more videos like this on our YouTube channel: https://www.youtube.com/@BlueMoonCamera.

Canon 50mm f0.95 Dream Lens vs. Leica 50mm f1.0 Noctilux V4 Lens
Hey guys, today we’re comparing two of the most legendary lenses ever made: The Canon 50mm f0.95 “Dream Lens” and the Leica 50mm f1 Noctilux v4, let’s get right into it.
We’ll start with the Canon Dream Lens, first released in 1961 in proprietary bayonet mount for the Canon 7 — this copy has been converted to Leica M-mount.
Born out of heated competition to produce ultra high speed optics, the Dream Lens lens effectively ended this arms race with its incredible f0.95 max aperture
Leica would not introduce the original 50mm f1.2 Noctilux until 5 years later in 1966.
In 1976 they released the first 50mm f1 Noctilux, nearly matching the Canon’s speed.
This lens is the 4th generation Leica 50mm f1 Noctilux, introduced in 1994 and distinguished by its built-in lens shade and modern coatings.
It’s generally considered the most desirable version of the f1 Noctilux, making it perfect for this comparison.
For this test, we’re loading with Kodak Ektar to take advantage of its fine grain and high detail.
We’ll shoot the lenses back-to-back on a Leica M7 body, with the aperture wide open and the shutter set to Auto.
With our M7 mounted on a tripod and our Ektar loaded, we’ll swap the lenses after each shot to compare the Noctilux and Dream Lens directly.
In each set, the Dream Lens shot comes first, followed by the Noctilux, and then side-by-side comparisons, let’s get started.
As expected, both lenses produce hyper-shallow depth of field and velvety-smooth bokeh, especially near the close focus limit.
The Noctilux and Dream lens share remarkably similar renderings wide open, with the Dream Lens exhibiting slightly more edge outlining in the bokeh and more flare in out of focus highlights.
Both lenses are gauss-type designs that feature 7 elements. With the benefit of an extra 15 years of optical engineering, the Leica does exhibit stronger contrast and finer detail reproduction, but surprisingly also has more pronounced vignetting than the Dream Lens.
Another unexpected result is that the Noctilux also appears to have more barrel distortion than the Canon. In terms of color, the Dream Lens generally produces a warmer-tone image, possibly the result of the age of the glass and coatings.
The Noctilux is the sharper optic and has even smoother, more plastic focus transitions than the Dream Lens, while the Canon has slightly busier bokeh and more flare, giving it a more distinctive rendering that lives up to its name.
And while we are principally interested in the qualities of these lenses shot wide open — why buy a Noctilux to shoot at f8 — we are also curious to see the image quality progress as the aperture is stopped down.
The Canon sharpens up dramatically between f0.95 and f1.4, but gains little extra by f2.8.
The Leica also gets much sharper between f1 and f1.4, but shows a substantial bump in contrast between f1.4 and f2.
Handling the lenses, the Noctilux is smaller and blocks less of the finder. Both optics have long focus travel, which helps with dialing in precise focus wide open.
Overall, we were shocked to find how similar the Noctilux and Dream Lens are — without a side-by-side comparison and detailed notes, it could be pretty difficult to tell their images apart.
The Dream Lens has more character, with busier bokeh and even shallower focus, while the Noctilux demonstrates superior contrast and sharpness combined with a strong vignette that leads the eye to the center of the frame.
Ultimately, both are halo lenses that few of us mere mortals will ever get to experience, but it’s been really fun comparing them directly on film.
If you could pick one to use for a lifetime, which would you choose — the Canon Dream Lens or Leica Noctilux? Let us know in the comments, we’re curious what you think!
Check out more videos like this on our YouTube channel: https://www.youtube.com/@BlueMoonCamera.

Shooting with a Brand New Leica Mini
What’s inside this little Leica Box?
To our surprise, it’s a brand new, never-used Leica Mini from 1991.
Today we’ll load it with its first ever roll of film and take a closer look at this Mini Leica from the early 90s, let’s get started.
It’s always fun to see how cameras came new from the factory — this one even has its original battery in the box, which we won’t be using today.
The Leica Mini is a very simple camera, but its fixed 35mm f3.5 Elmar lens provides remarkably good image quality.
Film drops in easily like most compacts, and the controls are very limited, with only an on-off button, self-timer, and a mode button for the flash.
Just like the classic Leica 3.5cm Elmar rangefinder lens, the Elmar on the Leica Mini features 4 elements in 3 groups, but was actually built to Leica’s specs by Minolta.
The Leica Mini itself was most likely built by Panasonic, and has a very plasticky hand feel, which does make the camera quite lightweight.
The Minolta Riva Mini and Panasonic C-625AF Super Mini are the same camera internally, making them great choices if you want to enjoy this camera’s image quality while avoiding the prestige and cost associated with the Red Dot.
What do you think of the Leica Mini and these sample shots? Let us know in the comments!
Check out more videos like this on our YouTube channel: https://www.youtube.com/@BlueMoonCamera.

Overview of the Mamiya RZ67 with the Mamiya-Sekor 50mm f/4.5 ULD

Testing a Mamiya 645E with the Mamiya-Sekor 80mm f/1.9 C Lens
Hey guys, this is a Mamiya 645E, a simplified version of the Mamiya 645 Pro with fixed film back and prism.
Today we’re testing this copy with the Mamiya 80mm f1.9 C, one of the fastest lenses in medium format, let’s get into it.
So, unlike the 645 Pro we have a unibody camera and film back.
Shutter speeds run to 1/1000th, and the 90-degree prism has a built-in light meter, generous diopter adjustment, and exposure compensation.
This camera is fitted with the manual winding grip, which requires two strokes to advance.
Now let’s take a closer look at this lens, which has brilliant coatings and a hefty, all-metal feel that contrasts substantially with the camera body. Focus and aperture are nicely damped.
To fire the Mamiya 645E without film, flip the multi-exposure switch and cock the shutter with two swift strokes.
The winding grip is removable and a standard winding handle can be attached in its place.
The grip does aid in handling the camera significantly, and compared with motorized grips is much simpler and lighter.
Depressing these buttons pops open the film door, and removing the insert, we can see the vertically-traveling shutter curtain.
Released in the year 2000, the Mamiya 645E occupied a unique niche in the market, offering the same image quality as Mamiya’s top-of-the-line professional setups at a lower cost and with less complexity.
Today it remains one of the best values in medium format photography, though the 645E is seldom seen in the US compared with its 645 Pro siblings.
As always, the 80mm f1.9 Mamiya-Sekor C lens delivers crisp images, with good contrast even wide open at f1.9.
This Mamiya 645E is a camera that cuts straight to the point of making quality exposures. What do you think?

Using the Pentax 67II with 75mm f/2.8 AL Lens
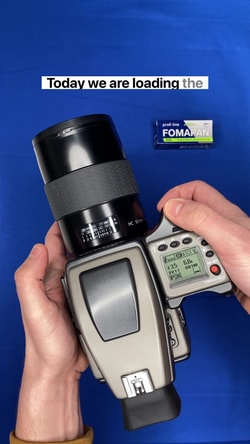
Using the Hasselblad H1 Camera
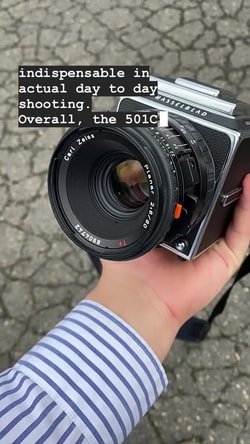
Shooting with a Hasselblad 501C/M and Cinestill 400D
The Hasselblad 501CM is the perfect camera for capturing the first week of fall on a roll of Cinestill 400D
This camera has the Acute Matte D Focusing screen, which is perhaps the brightest focusing screen of any camera we have tested and makes composition with this modern Hasselblad a joy
It also features the Zeiss 80mm f2.8 Planar CFE lens , which has an enlarged focusing ring with longer focus throw and a rubberized finish that further adds to the tactile experience of focusing with this camera
This lens is one of the sharpest optics available in medium format, and yields stunning results.
The 501CM also features the Type IV A12 back that includes the dark slide pocket, a seemingly minor consideration that is indespensibel in actual day to day shooting
The 501 adds tasteful enhancements to the classic Hasselblad 500CM chassis, and that makes it one of our favorite medium format cameras. This beatiful copy is available now in our store and on our site!

A Fujifilm GF670 Loaded with Harman Phoenix II
Alright guys, today we’re testing the new Harman Phoenix II in 120 with this Fuji GF670, let’s take a closer look.
The GF670 is one of my favorite medium format machines, combining a clever folding design made popular over 100 years ago with modern optics and built-in light metering.
Opening the camera back, we can see how the lens and bellows extend into position, and that the electronically-controlled shutter is self-cocking.
The Fuji GF670’s party trick is the unique ability to switch between the 6x6 and 6x7 format — today we’re shooting 6x7.
Ok, on to Harman Phoenix II.
This film is one of the most exciting releases in recent memory, promising improved color, finer grain, and better exposure latitude compared with the original Phoenix film, which was fun for experimental use but had a strong yellow-green color cast and a highly visible, almost gritty grain structure that could make it difficult to use for everyday shots.
Phoenix II has been redesigned with improved film layers and dyes, with Harman claiming “more normal” contrast and color balance while retaining halation in the highlights.
The lack of an orange mask in the film base means that color will still render substantially differently than typical color negative films.
With our roll loaded in the GF670, let’s get out and shoot to take a look at this new film for ourselves.
Color is unusual and vibrant, with a rich indigo blue in sky tones that actually reminds us of slide film — we were surprised to get an almost black sky in this shot.
Grain is indeed much finer, especially in 120 — overall, this is a very promising new color film that we can see becoming a new regular in our rotation.
Have you shot Phoenix II?
Check out more videos like this on our YouTube channel: https://www.youtube.com/@BlueMoonCamera.
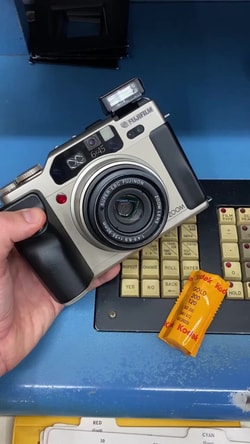
A Walk Around Town with the Fujifilm GA645zi
A quick walk around the neighborhood with this Fuji GA645Zi. These are basically big medium format point-and-shoots, and create razor-sharp images. Have you ever shot with one?
Check out more videos like this on our YouTube channel: https://www.youtube.com/@BlueMoonCamera.
Blue Moon Camera and Machine llc
- sales@bluemooncamera.com
- (503) 978-0333
- (503) 978-0370
-
8417 North Lombard Street
Portland, OR 97203
All rights reserved ©2026, Blue Moon Camera and Machine llc
v. 10.05 | 2026-10-06 17:24:55
Oops! Our website needs to cool down for a minute.
In the meantime, some features and components may not load or work correctly. Please try again in a few moments.